The puzzle I picked is called "College of Magical Knowledge" and is artwork by James C. Christensen. I did another of his last year, framed it, and gave it to Olympia as an anniversary gift. I like his artwork and his paintings make for great puzzles. This one (like the one last year) is 1500 pieces. I find that I can do a 500 piece puzzle in an afternoon, 1000 pieces with some free time spread out over a week, and 1500 in about three weeks. 1500 is also about as many as I could reasonably fit on my desk unless the pieces themselves were smaller. Even as it was, there were pieces stacked on top of pieces for quite awhile.
So, without further ado, here are the photos, from start to finish.

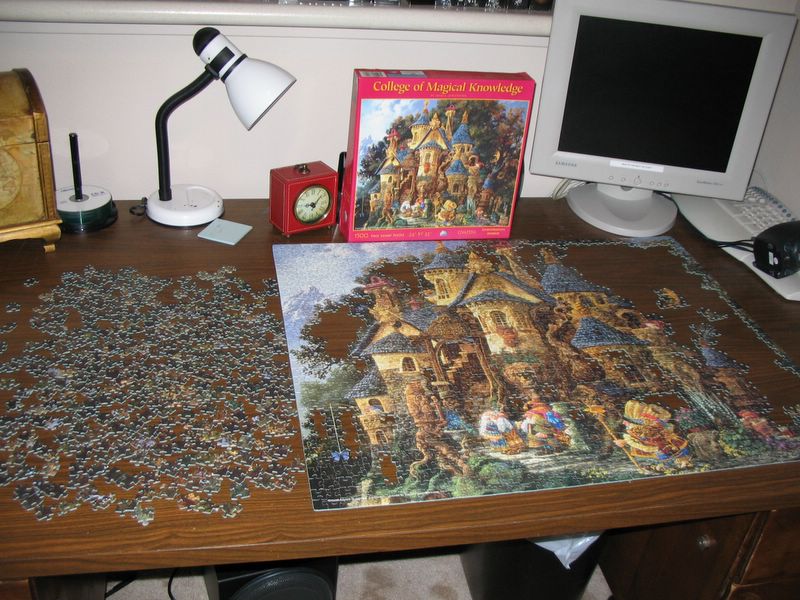
All Face Up

Getting all the pieces face up is always a great first step. You can see that many of them are stacked on others because of the space restrictions and that I've already pulled out most of the edge pieces. A few always get by, so I'll have to hunt for them later.

Frame Complete
I took the picture above as soon as the frame was fully assembled. I'd also picked up a few other things along the way. I had a couple edge pieces that I couldn't find for a long time, as they were buried under other stuff. Rather than focus on just one piece, I moved on, figuring I'd spot the remaining edges as I worked on other sections, which turned out to be the case.

Some Obvious Stuff
Most puzzles have some things that are fairly obvious. In this case, there were a few people and some particularly brightly color rooftops that came together quickly. Once there are a few sections together, space on the desk becomes more readily available, so it's a big step to get all the unassembled pieces outside the frame, as I've done here. In fact, it's more important than resolving the stacking problem, which I still had.

Buildings Coming Along
The buildings were next because they were distinctively yellow, orange, and yellowish brown. I'll browse through the unassembled pieces and pick up a handful of pieces of the same general color, make a space for them, and lay them out again. Then I can try to assemble chunks that can be dropped into the overall puzzle. You can just such a pre-assembly area just to the lower left of the frame area.
I also end up picking up a lot of "here and there" pieces during this process. I seem to have a knack for seeing some piece and getting an "Aha!" moment where I know just where it's supposed to go.

All Rooftops Complete
I'd made a lot of progress at this point. The rooftops were all blue tiles and the buildings themselves were rather yellowish or orange, so they were (relatively) easy to separate out from, say, trees. Note the largely lacking presence of yellow in the pieces stuck off to the side. This was also a great point because I had just put all the assembled pieces on one side of the puzzle and made sure that none were stacked on another.
Building Pretty Much Complete
As the caption says, the main building was pretty much complete. The rest of this was going to be much harder because it was mostly just leaves and tree-trunks. There were still a couple of very pesky holes that seemed like they should have been easy to find that were really bugging me.

Just Trees Left - Working By Shape
Toward the end of assembling a puzzle, when the colors aren't very helpful because the color of one piece and the color of the one next to it may not match much, I have to work by shape to maintain my momentum. Shape, at that point, is easier. When the number of remaining pieces is getting down to under about 250 or so, I'll sort them, as you can see in the picture above. I put all the pieces with no "outies" together, then the pieces with only one, with two that are perpendicular, with two that are opposite, with three, and with four, each in their own area. I'll sometimes sort those groups further based on other characteristics, ideally down to where no group has more than 10-20 pieces in it. For the pesky holes I mentioned above, this usually means they are filled in a few minutes as I know exactly what shape I need and I only have to search through a few pieces to find it. For the large holes, I can work across in rows where I know two or three characteristics of the piece I want and can use that to narrow my search down to a much smaller number.
Also, in that picture you'll see that I've turned the puzzle upside-down. That was because I can only work from one side of my desk and that let me put the empty hole in the puzzle right next to the pieces. I actually dropped a whole corner off when I was doing it and had to take about fifteen minutes to patch the pieces off the floor back into place.

Assembly Complete - Time to Glue
At last, I'm done (with assembly!) I've slid a piece of butcher-block paper under the completed puzzle and turned it around again, even though I didn't really need to do so. Next up was to glue it together. I've used either the puzzle glue that comes in small bottles with exactly the right consistency or standard white glue (like Elmer's) that's been watered down with equal success. It's really weird the first time you do it because it feels like you're ruining it. The glue is painted on the front of the puzzle. What happens, though, is that it dries clear and fills in the gaps between pieces. You have to have some kind of backer underneath because some of the glue will seep through the cracks and glue the puzzle to the table if you don't. Once it dries, supposedly an hour although I tend to leave it overnight, I trim the back and I have a piece I can pick up. Unless I use a more solid backing, it's usually turned into a rather flexible piece of cardboard. For some puzzles, that's it, it can go on the wall as is. In this case, though, I have more planned.
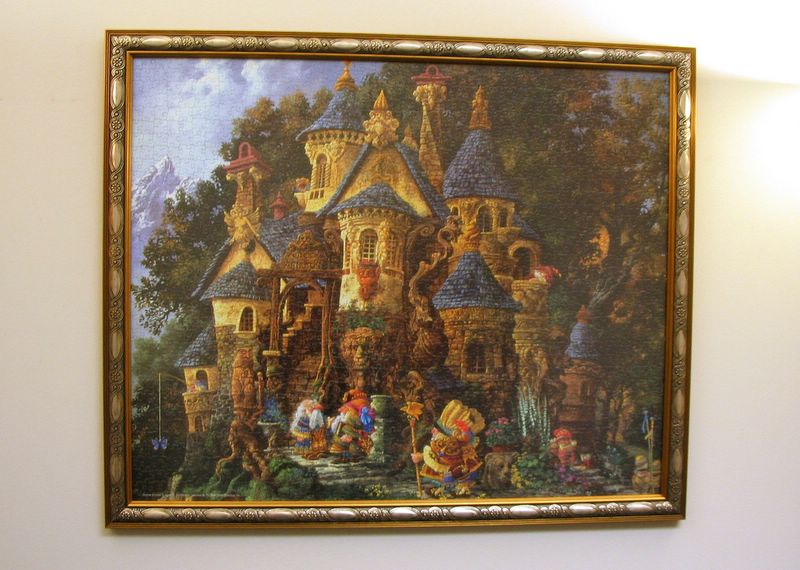
Framed, On the Wall
And here it is, the finished product, hanging on the wall in my office. I took the finished and glued puzzle to a custom frame shop. It was during Olympia's visit last week, so we picked out a frame together and she finally hit on one that looks truly excellent. I got it back yesterday and hung it, then took my camera with me to work today to get this last picture. It looks great and because it has so much of my labor in it, it means more to me than a much more expensive piece I have hanging in my apartment (on loan from a friend - I can't afford really expensive artwork!)
I'm guessing there's about 20 hours of work in this one and it's totally worth it. Maybe it'll inspire a reader to do one, too?
2 comments:
wow impressive! it looks great framed and on the wall.
I am definitely going to try to do this project with my kids.
I have the perhaps unfortunate but entertaining tendency to look at the peripherals in images. Your puzzle is impressive and I like the story, but I also enjoyed the migration of the computer keyboard (for example). Begone, evil anachronism. :)
Post a Comment